Getting Started with Python
If you are new to Python or want to get started, this page is for you. I will cover the basics of Python and how to begin using it. I will also share some tips and tricks I have learned over the years.
This page assumes you have little prior knowledge of Python or need a refresher. Perhaps you have become accustomed to working with Jupyter Notebooks and are looking for the next step. Once you get the hang of it, you can visit the other pages to understand how to structure, test, and maintain a model.
Learning the Basics
If you are completely new to Python or need a refresher, I recommend going through:
- Intro to Programming Course to understand the basics of programming.
- Python Course, which is a concise course for Python.
- Pandas Course to understand Pandas, as it is fundamental to Python use in many industries.
- (Optional) Machine Learning Course, but only if you plan on using Machine Learning in your projects.
I recommend Kaggle because it is an entirely free platform (no annoying paywalls). Familiarizing yourself with Kaggle can be a great way to start your own projects, as it offers plenty of datasets to experiment with.
Once you have finished these courses, the most important advice I can offer is: absolutely do not enroll in any “Python Certification”, watch someone else code, or read books solely about “How to Program in Python”. Learning Python isn’t just about syntax; it’s about learning how to solve problems using Python. This skill is best acquired through practice, not just through courses, videos, or books about the process. Exceptions include higher-level content such as model architecture.
I recommend starting with a project that interests you. All the projects listed below originated from a personal need and significantly helped develop my Python skills, especially through building open-source projects and occasionally receiving feedback from others.
With the Finance Toolkit, I wanted to see if I could improve my fundamental analysis using Python while also getting familiar with NumPy and Pandas.

With the Finance Database, I aimed to create a database to find products compatible with the Finance Toolkit functions.

With Personal Finance, I wanted to understand my spending habits and determine how much money would be left at the end of the month for investing. This also allowed me to experiment with Excel and Power BI integrations.

Installing and Working with Python
To get started, download the Anaconda Distribution and use a Jupyter Notebook as follows:
- Go to https://www.anaconda.com/download and install the application.
- Open the “Anaconda Navigator” and launch “Jupyter Notebook”. Alternatively, use
jupyter notebookin the command line. - Create a new notebook and start coding!
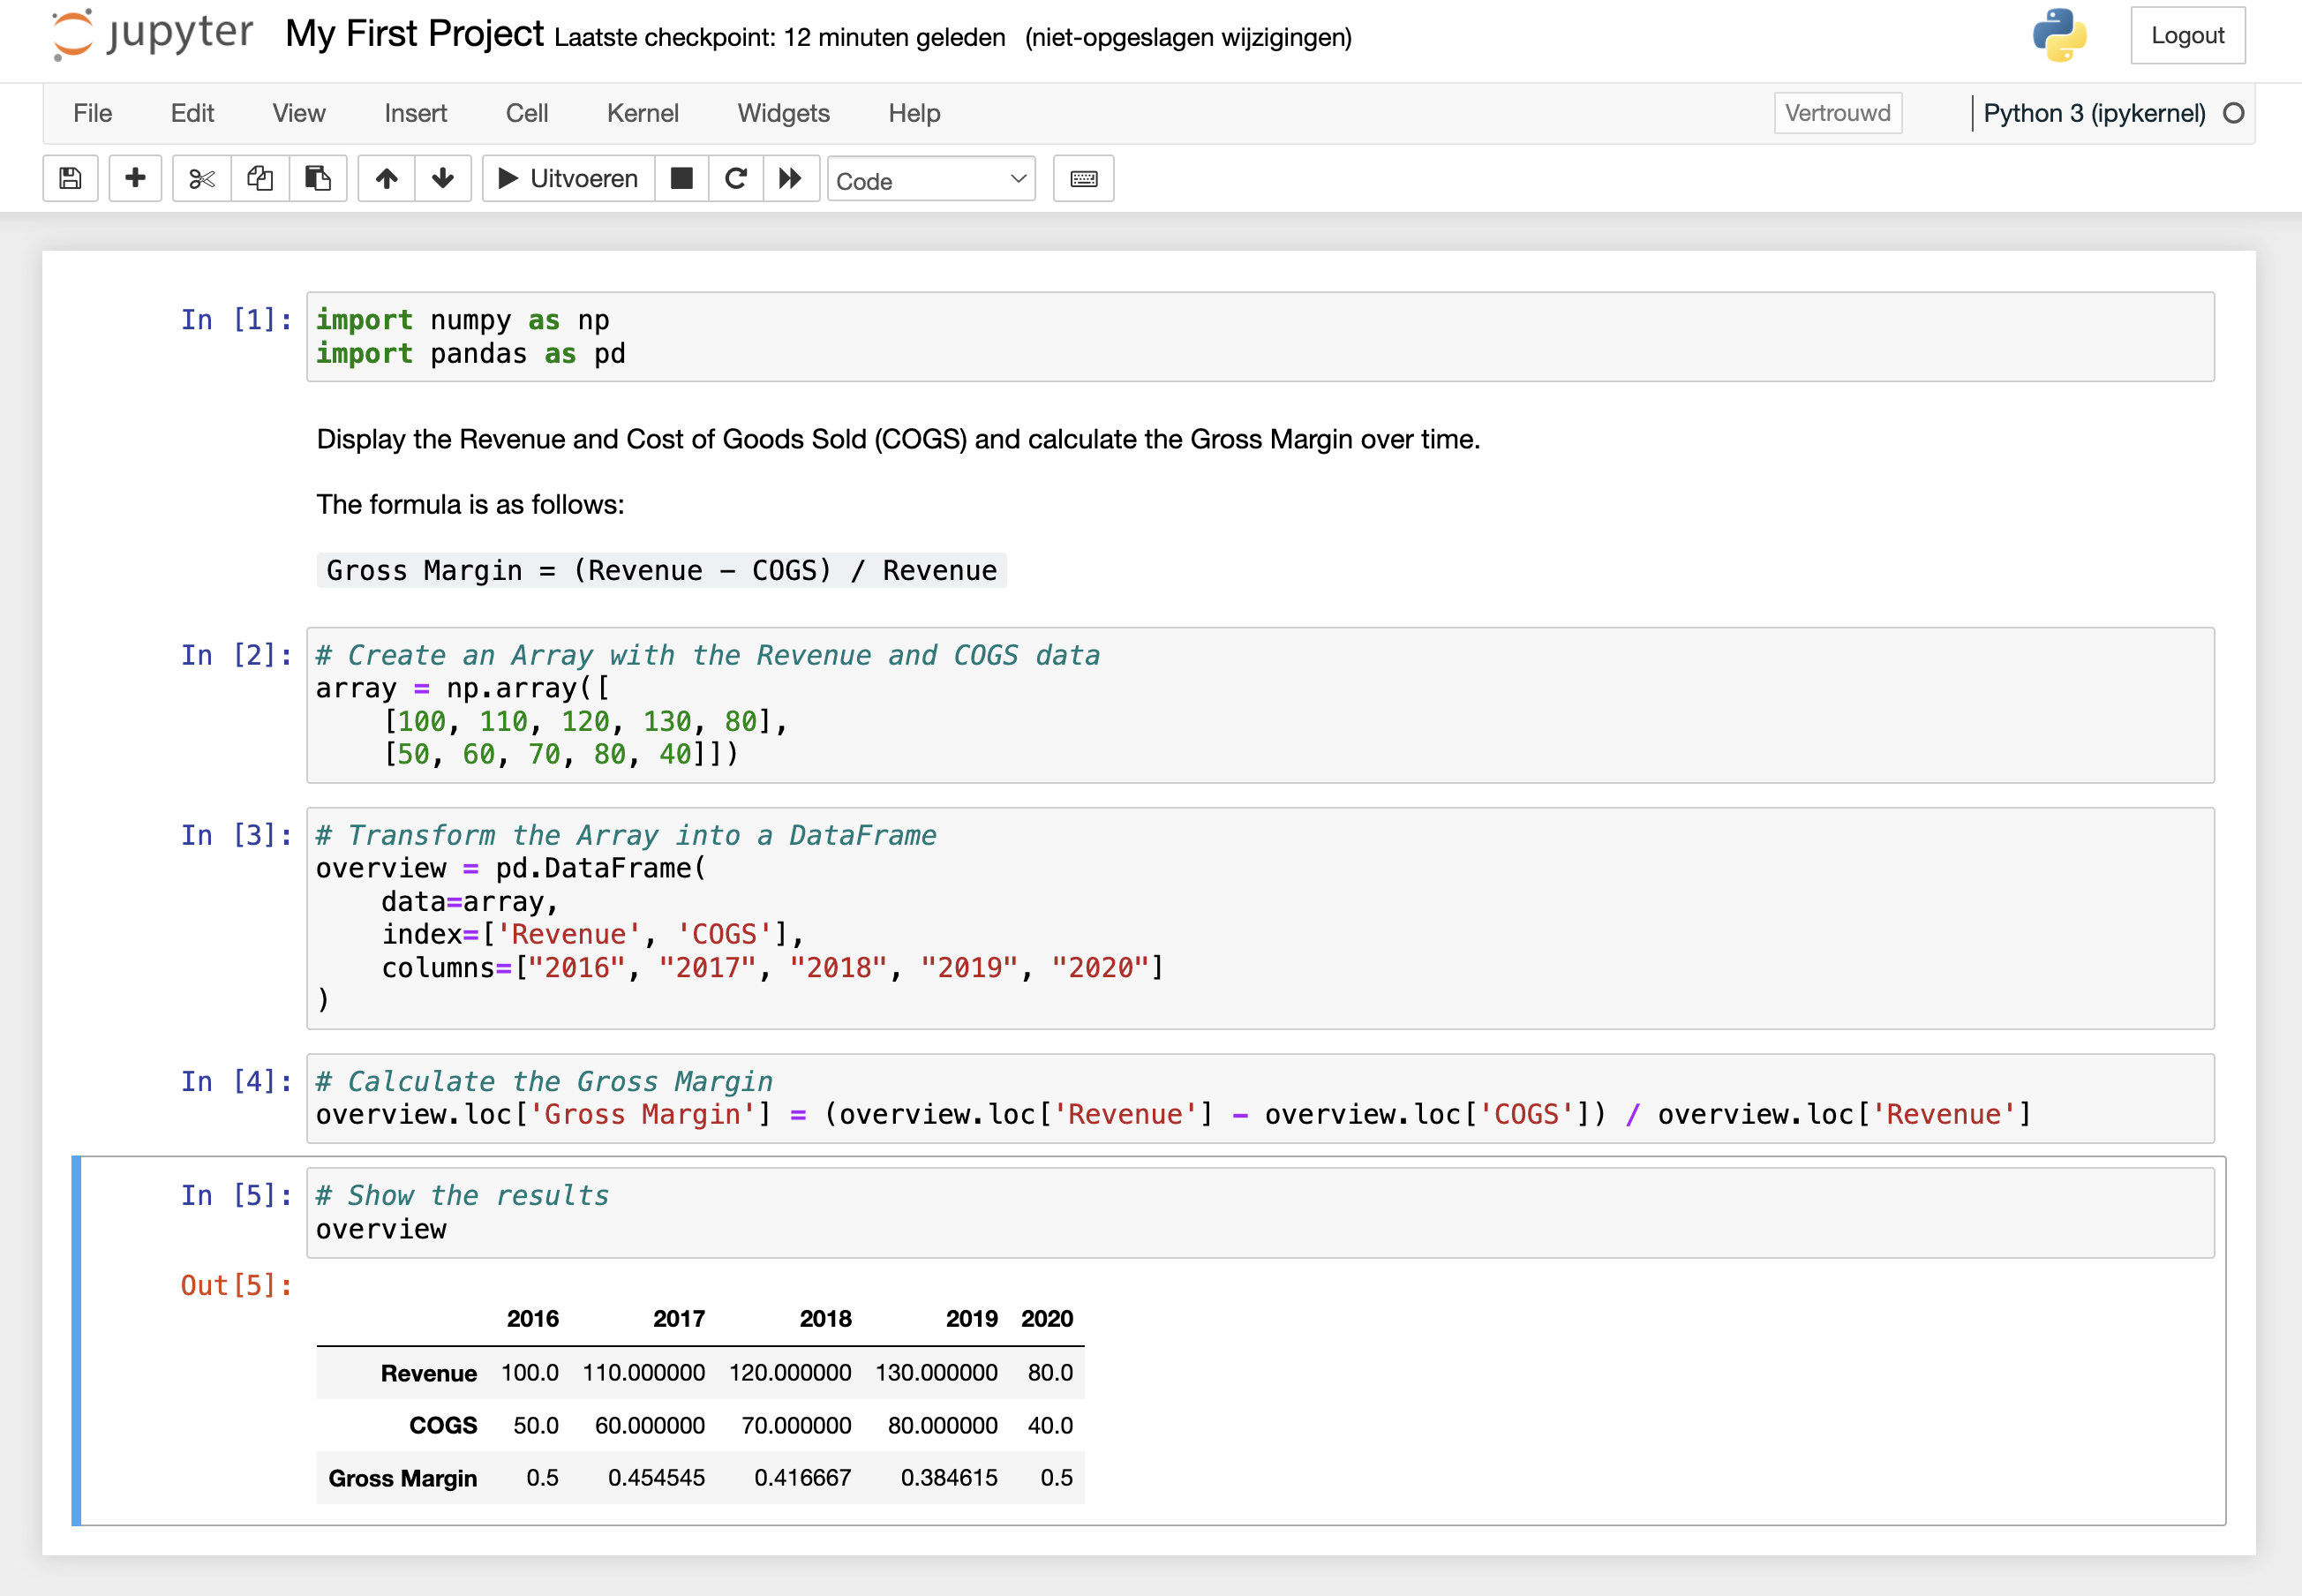
Jupyter Notebooks should be your primary tool until you have familiarized yourself well with the syntax. See an example of how such a Notebook could look below.
One of my first projects was simply a collection of Jupyter Notebooks (see here). This was a university project where we used Python for Pairs Trading. It’s by no means perfect, but it demonstrates the utility of Jupyter Notebooks for getting started.
Why work with Jupyter Notebooks?
Jupyter Notebooks are popular because you can easily run code in blocks and see the output immediately. This allows for experimentation and quick feedback. Once you are more familiar with the syntax, you can transition to a code editor like Visual Studio Code or PyCharm. These editors also support Jupyter Notebooks, which remain useful for debugging functions and testing code.
Some tips to focus on while learning Python:
- Work primarily with foundational packages like NumPy, Pandas, and SciPy. These packages are commonly used in most projects. Avoid diving into Machine Learning packages like Scikit-learn or TensorFlow until you have a solid grasp of the basics. You don’t want to constantly copy and paste code from StackOverflow without understanding it.
- Acquire (financial) datasets to experiment with. Visit Kaggle or use the Finance Toolkit. Install it via
pip install financetoolkitor use!pip install financetoolkitin a Jupyter Notebook. The examples found here should help you get started quickly. Since they rely on NumPy, Pandas, and SciPy, you should be able to work with the data quickly. - Google any issue you don’t understand. Someone has likely encountered the same problem, and a solution probably exists. This is where the open-source community shines, offering solutions for nearly everything.
- Definitely use ChatGPT whenever you are stuck with your code. While AI tools like ChatGPT can generate code, the quality can vary. Remember: code is read much more often than it is written. Use ChatGPT to fix mistakes and get a general idea for solving a problem, but write the code yourself. Don’t limit yourself by avoiding AI due to concerns about “cheating” or originality.
- Don’t worry about dependency management, linters, pytest, styling, etc., initially. Until you have a solid understanding of the basics, these tools will likely only confuse you. Although crucial for developing robust models later, they will complicate things while you are still learning.
Looking for project ideas? Google and ChatGPT offer plenty. Don’t be discouraged if your idea has already been implemented. For example, while multiple applications similar to my Personal Finance tracker exist, I designed mine to provide the specific insights I needed.
The Next Steps
Once you are comfortable working with Python, you can start using the following tools to improve your programming skills and code quality:
- Install a Code Editor like Visual Studio Code or PyCharm. These editors help in building actual models using
.pyfiles and facilitate interaction between multiple files. Packages like Pandas and NumPy, which you’ve likely used, are developed using such editors as they involve multiple interacting files. - Create a public or private project on a platform like GitHub. GitHub is a platform where over 100 million developers collaborate on open-source projects and manage Git repositories (e.g., my own here). Platforms often used within companies include Azure DevOps or BitBucket, which share similar functionality. See a guide about GitHub here.
- Download Git to version control your project. Using commands like
git add,git commit -m "Initial commit", andgit push, you can create a version history. This makes it possible to track project evolution and revert changes if necessary. Using Git is extremely important, and the subsequent pages assume you have it set up.
Once you have completed these steps, it’s time to start setting up your project. Visit Setting up your Project to continue!